
 By Nick John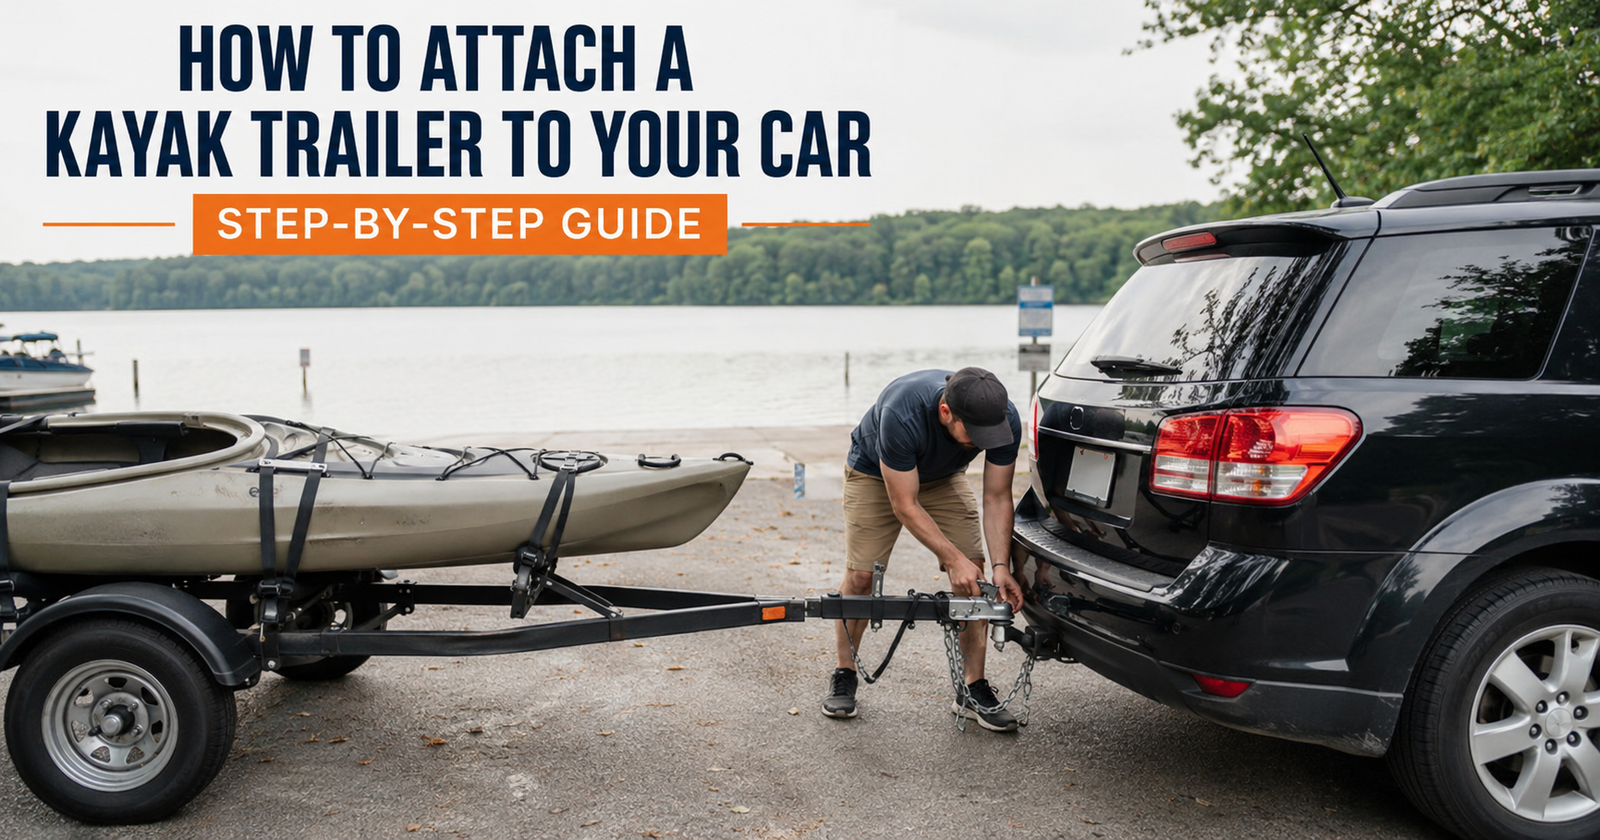
Getting a kayak in the water safely begins long before you get there. Kayakers often use roof racks to transport their kayaks, but kayak trailers are one of the most practical and secure ways to transport one or more kayaks. Trailers mean you don’t have to lift heavy items onto a vehicle’s roof, reduce stress on your vehicle, and make loading and unloading a lot easier.
But owning a kayak trailer also means knowing how to properly attach to your car. A minor hitching error can create hazardous conditions on the road, such as trailer sway, couplers becoming disconnected, or equipment damage. Whether you are going on a weekend fishing trip, a family paddling adventure, or a long distance kayaking expedition, you need to know the proper procedure for attachment to stay safe and keep other road users safe as well.
In this guide, we will walk you through the steps of how to hook up a kayak trailer to your vehicle, from preparing your gear to the final safety checks before you drive away. If you follow these steps carefully, you will develop a routine that ensures your trailer is safely hitched every time you go somewhere.
Why Proper Trailer Attachment Matters
Connecting a kayak trailer might seem simple, but it’s a combination of many components. The hitch ball, coupler, safety chains, electrical wiring and trailer jack all work together to form a secure connection between your vehicle and trailer.
These components, when properly installed, enable the trailer to follow smoothly behind your vehicle when turning, braking, or accelerating. A properly fitted trailer reduces sway, prevents unwanted disconnection and ensures the brake lights and indicators are working properly.
On the other hand, a trailer that is not properly attached may unexpectedly detach, creating a very dangerous situation. It’s always worth taking a few extra minutes to finish an attachment process thoroughly.
1. Understanding the Main Parts of a Kayak Trailer Hitch
It’s a good idea to know the major parts involved before you hook up your trailer.
The hitch receiver is installed underneath your vehicle and is the base for towing. It has the ball mount that supports the hitch ball. The hitch ball, a metal sphere, fits into the trailer coupler.
The coupler is at the front of the trailer tongue. It locks around the hitch ball and keeps the trailer attached when towing.
Safety chains are a secondary connection in case the coupler breaks apart somehow. They help prevent the trailer from fully breaking away from the towing vehicle.
The trailer jack supports the trailer tongue when it is not connected to the vehicle. After you have attached the trailer, drive with the jack all the way up.
The trailer brake lights, indicators and running lights are supplied with power through electrical connectors. If you trailer does not have a working electrical connection, it may not be road legal.
Understanding how each of these parts works makes the attachment process much easier and safer.
2. Check Your Vehicle’s Towing Capacity
Before hitching any trailer, make sure your vehicle is able to tow it safely.
Each vehicle has a manufacturer-specified maximum towing capacity. This is the total weight of the trailer, all kayaks, paddles, life jackets, camping gear, coolers and accessories loaded on the trailer.
Overloading your vehicle’s towing capacity puts too much stress on the engine, transmission, brakes and suspension. It can also decrease handling performance and increase stopping distances.
Always consult your owner’s manual before towing for the first time.
3. Inspect the Trailer Before Hitching
A quick check can help pick up potential problems before you start your trip.
Check tires for proper inflation; look for cracks, cuts or excessive wear. Inspect the trailer frame for rust, loose bolts or structural damage.
If the trailer has been stored for a long time check the wheel bearings. Check coupler latch for free movement and proper lock.
Check the safety chains for broken links or rust. Check the electrical connector for bent or damaged pins.
Finally, make sure the trailer jack is moving freely and is properly supporting your trailer.
If these checks are done before each trip , it is highly unlikely that the vehicle will experience mechanical problems while on the road .
4. Position Your Vehicle Correctly
The simplest way to attach a kayak trailer is to carefully line your vehicle up with the trailer tongue.
If possible, ask somebody else to assist you to back up. They can tell you good directions and help you from oversteering
If you are alone , look in your mirrors and back up slowly . Nowadays, backup cameras make it easier to get things aligned.
The idea is to get the hitch ball directly under the trailer coupler. Take your time with this step – it will save you effort and frustration later on.
If the alignment isn’t perfect the first time, just pull forward and try again rather than forcing the trailer into place.
5. Raise or Lower the Trailer Coupler
Raise the trailer tongue with the trailer jack until the coupler is just above the hitch ball.
With the vehicle properly lined up under the coupler, use the jack to lower the coupler down slowly onto the ball of the hitch.
You will often hear or feel the coupler lock firmly on the ball.
Don’t drop the trailer too fast it can damage the coupler and the ball on the hitch.
Give yourself time to adapt little by little until all is in just the right place.”
6. Lock the Coupler Securely
Once the coupler is fully on the hitch ball, engage the locking mechanism.
Most kayak trailers have a latch that clamps tightly over the ball on the hitch. Some also have a locking pin or safety clip to keep the latch from opening up accidentally whilst travelling.
Lock the coupler, then lift the trailer jack a little to check that the trailer is still attached to the vehicle. If the rear end of your vehicle lifts slightly and the trailer does not detach, the coupler has probably locked in place correctly.
If the trailer comes off the hitch ball, lower it immediately and reattach it until it locks into place.
Always test the coupler to ensure it is fully engaged before you trust it.
7. Retract the Trailer Jack Completely
Once you’ve checked that the coupler is tight, raise the trailer jack up all the way.
Many new trailer owners inadvertently leave the jack partially down, which can cause serious damage when the vehicle is moving.
If your trailer has a travel bracket, crank the jack up to its maximum position and lock it in place.
Before driving away, be sure the jack is low enough to the ground.
If stored properly, the jack will not scrape, bend or break when travelling on rough roads.
8. Attach the Safety Chains Correctly
Safety chains are a very important backup in case your coupler comes off while on the road.
Instead of connecting the chains straight across, link them under the trailer tongue and then attach them to the hitch loops on your vehicle. This cross configuration forms a cradle to assist in supporting the trailer tongue if it becomes separated from the hitch.
The chains should be loosened enough to enable the smooth turning without becoming taut but never should they drag on the surface of the road.
Before you start your journey, check that the chain hooks are fully locked and securely fastened.
9. Connect the Trailer Wiring Harness
After the mechanical connection between your vehicle and trailer is made, the next job is to wire the electrical harness. That connection provides power to the trailer’s brake lights, turn signals, tail lights and sometimes reverse lights. Lighting is very important to communicate your intentions to other drivers and follow the road rules.
Locate the electrical socket near the hitch receiver on your vehicle and plug the trailer connector into it. The plug should go in easily without pushing too hard. If the connector feels loose, check the two ends for dirt, corrosion, or bent pins and try again.
Make sure there is enough slack in the cable to allow turning but not so much that it will drag on the road. Many trailers have clips or holders to help keep excess wiring away from moving parts. A well-connected wiring harness reduces the risk of electrical failure on your trip and keeps you visible to other drivers.
10. Test All Trailer Lights
Make sure that all trailer lights are working properly before leaving your driveway or parking area. If the wiring looks connected, but the bulb is damaged or the connection is loose, it can prevent signals from working.
Have someone stand behind the trailer and turn on the headlights, brake pedal, left indicator and right indicator. When alone, use reflections from nearby windows or walls to check the lights.
Take the time to identify and correct any issues before hitting public roads. Driving with broken trailer lights is not only a safety hazard but can also lead to fines or penalties depending on local laws.
11. Secure the Kayak Properly
But, that’s only half the equation. You also need to secure your kayak so it doesn’t move around during transport.
Place the kayak evenly on the padded supports or cradles of the trailer, distributing the weight as evenly as you can. Use good quality cam straps or ratchet straps to hold the kayak down securely, but not so tight as to damage the hull.
The bow and stern should be stable for the entire journey. Tighten the straps, then give the kayak a gentle shake to make sure it will not move. If it moves, tighten the straps until it is all secure.
Loose kayaks can create dangerous situations, especially when braking suddenly or when driving on rough roads. Taking a few moments to properly secure your gear will help protect your kayak and other road users.
12. Perform a Complete Walk-Around Inspection
Do a final walk-around inspection of your vehicle and trailer before putting your vehicle into gear. This simple habit can save you from many common towing headaches.
Ensure the coupler is locked and the safety pin is in place. Be sure the trailer jack is fully raised and locked. Make sure the safety chains are crossed properly underneath the trailer tongue and aren’t dragging on the ground.
Re-check the electrical connector, making sure it is properly seated. Check the inflation of each trailer tire, and do a quick check of the kayak straps for signs of looseness.
It takes a minute or two to do a complete walk-around, but it can go a long way toward preventing a problem from being discovered after you’ve started to drive.
13. Drive Carefully During the First Few Miles
On the road, avoid sudden acceleration or aggressive braking. Allow yourself time to become accustomed to the extra weight behind your vehicle.
Pay attention to how the trailer tracks in turns and lane changes. If you notice any strange swaying, vibrations or noises, pull over to a safe place and check the trailer right away.
Drive for 5 to 10 miles, then make a brief stop to recheck the coupler, straps, safety chains, and trailer lights. Once the kayak settles, some new straps may stretch out a bit, so it’s a quick check worth doing.
This habit will ensure that everything remains safe for the rest of your trip.
Common Mistakes to Avoid
Most towing problems are not due to mechanical failure, but to simple oversights. One common mistake is to use the wrong size hitch ball. A slight misalignment of the hitch ball and the trailer coupler can result in a loose connection.
Another common error is not locking the coupler after you drop it on the ball of the hitch. If the lock is not in the locked position, the trailer can break loose.
Some drivers fail to cross the safety chains under the trailer tongue. This reduces their effectiveness if the coupler breaks free. Others forget to plug in or test their trailer lights before driving.
Another mistake that can be avoided is overloading the trailer. Towing more weight than your trailer or vehicle is rated for puts undue stress on the towing system and impacts braking ability.
The attachment process, often rushed, leads to skipped safety checks. The best way to avoid these common mistakes is to establish a routine before every trip.
Tips for Safe Kayak Trailer Towing
Properly hooking up the trailer is only part of safe towing. Drive at moderate speeds, particularly on highways where the possibility of trailer sway is increased. Try not to make sudden turns if you can help it, and allow for more distance between you and the car in front of you for braking.
Make wider turns to allow for the path of the trailer. Be aware of your trailer height and width when turning in parking lots, fuel stations and narrow roads.
It’s also important to do regular maintenance. Periodically check wheel bearings, lubricate the moving parts of the hitch, check tire pressure, and replace worn straps or damaged electrical connectors before they become serious problems.
The more you practice towing, the more comfortable and confident you will be on longer trips.
Learn More About Kayak Transport with Buzzplanets
Buzzplanets is a great resource for practical outdoor advice, gear guides and transportation tips if you are looking for ways to make your kayaking adventures more enjoyable. Whether you are learning how to attach a kayak trailer, comparing different types of trailers, maintaining your towing equipment or planning your next paddling destination, Buzzplanets offers informative articles for beginners and experienced kayakers. So it’s worth looking up the advice of the experts before every trip so that you can travel more safely, protect your equipment and enjoy every journey with more confidence.
Conclusion
Once you know what each step is and follow a regular routine, attaching a kayak trailer to your car is a pretty simple process. Getting the vehicle in line and locking the coupler, to hooking up the electrical wiring and performing a final safety check, each step aids in making towing safer.
Shortcuts in the attachment process can result in equipment damage or hazardous situations on the road. By taking a few extra minutes before each trip, you can make sure your kayak trailer is secure and your trip starts with confidence.
Correctly attaching your kayak to a trailer is the first step to safe and enjoyable kayak transport, no matter if you are going to the lake down the road or on a cross-country paddling trip.
Summary
To safely attach a kayak trailer, you will need to prepare both the vehicle and trailer, align the hitch properly, lock the coupler securely, attach crossed safety chains, connect the electrical wiring, test all trailer lights, secure the kayak properly, and complete a thorough final inspection. By consistently following these steps, you can avoid accidents, protect your equipment, and have a smooth stress free trip to your next kayaking destination.
FAQs
1. How do I know if my hitch ball will fit my kayak trailer?
The hitch ball must be the correct size for your trailer coupler, which is usually 1 7/8″, 2″ or 2 5/16″. The right size will give a secure connection.
2. Should I cross the safety chains?
Yes. A cradle formed by crossing safety chains under trailer tongue can help support the trailer if it disconnects from the hitch.
3. How often to check the trailer during a trip?
During the first 5 to 10 miles, check the coupler, straps, safety chains, lights and tires. On longer trips, perform these checks at each routine rest stop.
4. Can a kayak trailer be pulled by a small car?
As long as the total weight is within the manufacturer’s recommended towing capacity, many compact cars can tow lightweight kayak trailers. Be sure to consult your vehicle owner’s manual before you tow.
5. What if the trailer starts to sway?
Don’t panic. Don’t jerk the wheel. Gradually slow down and pull over safely to check the trailer. Before you go, check to make sure your load is balanced, the hitch is tight, the tires are properly inflated, and the straps are in place.